Introduction: Razorpay
Our world is digitalizing, and so is business. Therefore, a businessman always
needs a secure, quick and smooth payment experience for their online
transactions. That’s what Razorpay, India’s biggest payment gateway, does.
Whether you are running a startup brand or operating a big online business, it
is the most trusted platform for WooCommerce payment integration.
Moreover, it supports all kinds of online payment methods including UPI, Net
Banking, Cards, etc.
Above all, this article will let you know about the complete Razorpay setup
for WooCommerce.
Let’s accept online payments in minutes…!
What is Razorpay? Understand Why You Should Use it

It is one of the most trusted payment gateways in the world designed to
make digital transactions simpler for businesses. Furthermore, you can
easily integrate it with WooCommerce, the best WordPress eCommerce
plugin.
Therefore, after its integration, you can directly (and safely) manage your
transactions via your website.
Why is it so? These are the reasons:
- Various Payment Options: Use UPI, wallets, Credit or Debit cards, and
other options. - Perfectly for Suited for Indian Businesses: The design has been
Indianized to support our currency and regulations. - Top-notch Security: PCI DSS Level 1 security features with double-factor authentication.
- Quick Payment Settlements: Get payments instantly to your business
bank account. No delays, no worries…! - Amazing Dashboard: You can easily track your previous transactions.
payments, and refunds.

Want to Begin Razorpay Integration? Check out What You Need

To start its integration with WooCommerce, these are the things you need to
have:
- Firstly, a WordPress website with installed (and configured)
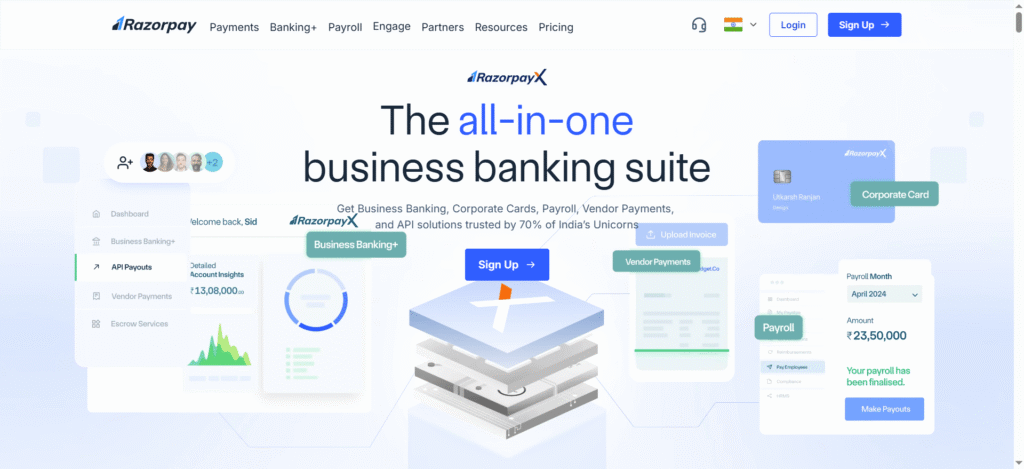
WooCommerce plugin. - 1 Razorpay business account. You can easily create it for free. Visit
razorpay.com and make one. - Your Key Secret and API Key ID. You will get both on your Razorpay
dashboard (after creating your account) - Lastly, a basic knowledge of your website settings is important.
How to Integrate Razorpay with WooCommerce? Find the
Complete Guide
It’s time to begin your integration. Let’s find the complete procedure in easy
steps:
Step 1: Install the Razorpay Plugin in Your WordPress
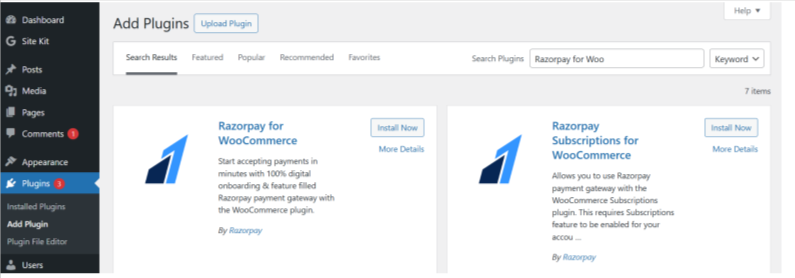
- Go to your website dashboard.
- Click on Plugins and select Add New.
- Type “Razorpay” for WooCommerce in the search tab. The plugin will
appear. - Select Install Now and activate it.
Step 2: Adjust Razorpay Settings
- Go to WooCommerce, then click on Settings and select Payments.
- There, you will find various payment options including “Razorpay.”
Activate it. - You will see the Manage option. Click and open its setup page.
Step 3: Integrate API Keys
- Go to your Razorpay Dashboard, click on Settings and find API Keys in
it. - Select Generate Live Key. You can also generate a Test Key for the
demo. - You will see the Key ID and Key Secret. Copy and paste them in the
- settings of WooCommerce Razorpay.
Step 4: Optional Settings for a Test Mode
Want to test it before the real integration? Here’s how you can do it:
- Go to the settings of Razorpay WooCommerce and click on the Enable
Test Mode. - Verify it by completing a few transactions to test if everything is going
well or not. - After testing, deactivate “Test Mode” to start receiving real payments.
Now save your settings by clicking on Save Changes. Your integration will
complete, and Razorpay will start appearing on your checkout page.
Test Your Integration Before Launching: Here’s How You Can Do
It
Before launching your business online, it’s better to test the working of this
integration. For this, you need to:
- Place a dummy order on your website.
- During checkout, select Razorpay as your mode of payment.
- Use the details of the test card. (You will get this for sandbox mode.)
- If your payment gets processed, verify it by confirming WooCommerce
orders and details on the Razorpay dashboard. - If you see “Payment Successful” then your integration has been done
correctly.
Some Amazing Features of Razorpay You Can Use to Grow Your
Online Business
- Smart Payment Options: Ease your checkout with dynamic payment
options. - Subscription Feature: Best feature if your website is based on
membership and needs regular renewals. - Pay Later Option: You can provide your customers with the facility to
Pay in parts. - Refund Management: Manage refunds easily with the help of
WooCommerce integration. - Instant Settlements: Quick fund settlements with better and easy
access.
How to Troubleshoot Some Common Razorpay Setup Issues?
There might be some issues you can face during this process. Let’s find what
can be these issues and ways to fix them:
- Payment Not Visible at Checkout: Check that “Razorpay” is enabled. Click
WooCommerce and select Payments to check. - Invalid API Key: Check your API key. Do not consider “Test Keys” as
Live Keys. - Failed Transaction: Go to payment setting in the plugin and check
whether the payment capture setting is automatic or not.
Pro Tips for Maximum Conversions: 5 Tips to Optimize Razorpay
Integration
- Show Your Users that You Accept Multiple Payment Methods
Display all the payment methods clearly on your payment page during
customer checkout. - Provide Discounts on a Particular Payment Method Like UPI
Customers love discounts on payment methods they use maximum. Try
to take its advantage. - Utilize Abandoned Cart Emails
Email customers who didn’t buy something due to payment gateway
failure. - Keep Your Payment Page User-Friendly
Users want a clear and easy payment page. Keep it that way. - Display Security Badge
Show “Powered by Razorpay” clearly on the payment page. It will
enhance buyers’ confidence on your website, and you will get more
repeat customers
Final Thoughts: Razorpay, One Solution to Simplify Your
Payments

Indian e-commerce is growing as people are continuously shifting to online
shopping. In such times, if you run an e-commerce business, then a smooth
The payment process should be your priority. Razorpay Integration with
WooCommerce will do exactly that. You will get the best for your business as
It is safe, engaging, and user-friendly for all types of entrepreneurs.
Therefore, whether you are operating an online marketplace, or a digital
institute, this integration will ensure that your payment system will be quick,
secure, and effortless.
Let’s begin with it and experience the change with growing revenue.